
Building the roof

I've started planning the roof structure so I went and bought some 100mm by 47mm sawn timber.
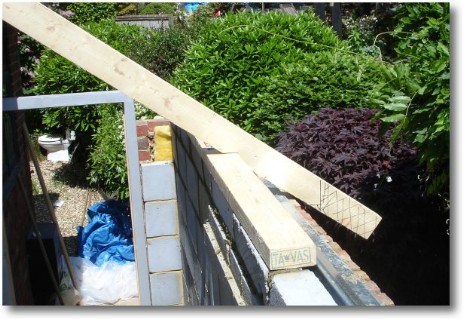
I placed the 2.4 metre length on top of the wall to act as the wall plate. I used the 3 metre length (the roof joists will be 150mm by 47mm) to determine the angle of the roof.
The planned angle is 35 degrees , which is about the minimum fall for roof tiles.
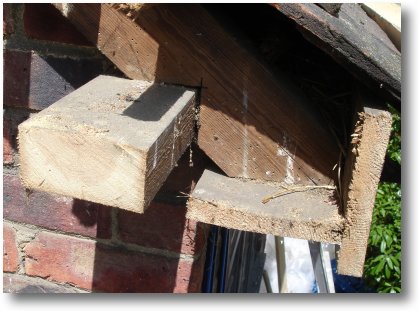
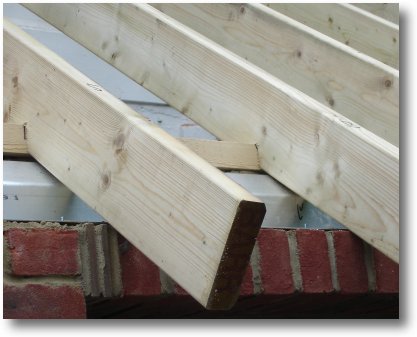
I cut a notch out of the roof joist so it rests on the wall plate.
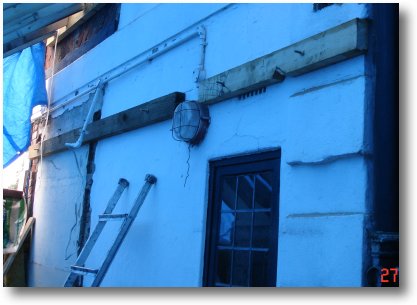
The joist will be cut off - I have marked the wood so that the soffit (the piece of wood on which the gutter is fitted) can be added. The soffit is planned to cover the upper half of the on-end bricks above the window.
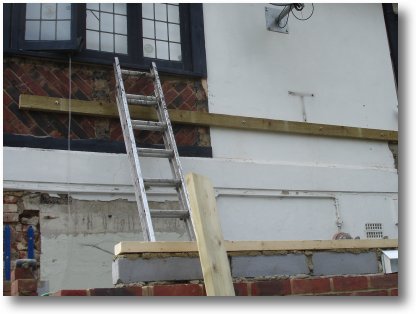
Tuesday, 22nd May: I cemented in the additional blocks today to bring the height of the inside wall up to where it should be. All I need do now is to cement down the wall plate. The wall plate needs to be strapped to the inside wall at some stage using metal straps.
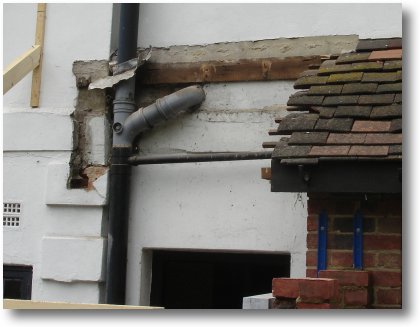
Thursday, 24th May: I demolished the roof above the back door of the house clearing the way to start building the new roof structure.

Friday, 25th May: I fitted the 1 metre wall plate straps - a total of four.
Building Control visit Stage 8 - wall plate: The Building Regulations Surveyor came at lunch at said that he was happy with the wall construction up to the wall plate.
We discussed the roof and he recommended that I use Tyvek breathable membrane together with 90mm insulation with a 50mm gap between the felt and the top of the insulation - quite easy using 150 x 47mm joists. I would then not need any other vents at the top of the roof or in the eaves.
This is a picture of how the existing soffit boards are fitted - I'll do it the same way.
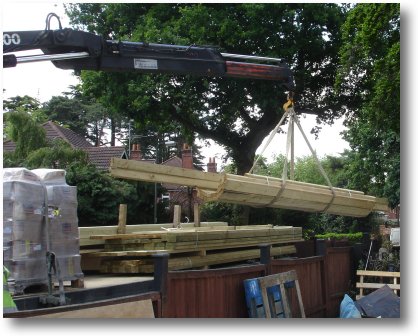
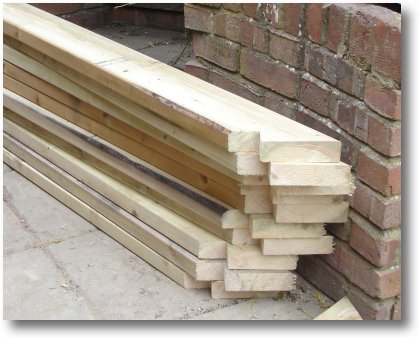
The roofing timbers arrive!
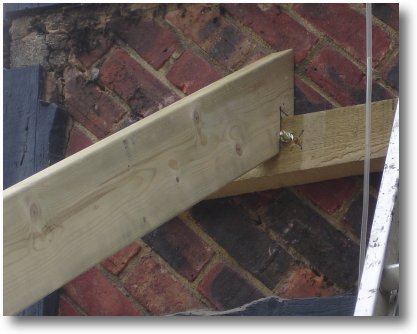
I used 10mm expanding rawlbolts to attached the 100mm by 50mm wall plate. The bolts were spaced at 800mm.
I cut the first 150mm by 50mm roof joist to sit on the wall plate.
The joists are made for building as they are preserved using Tanialith 'e' and strength graded.
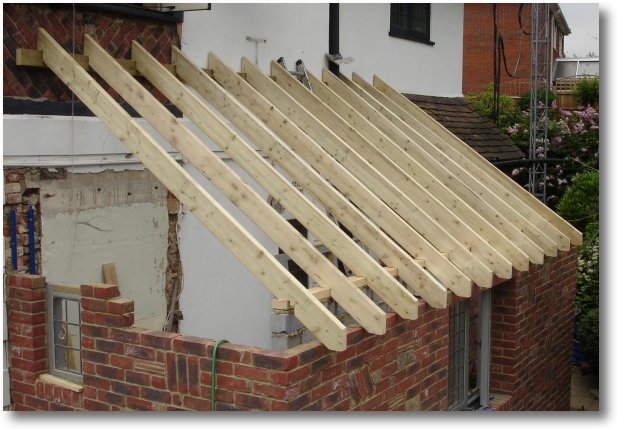
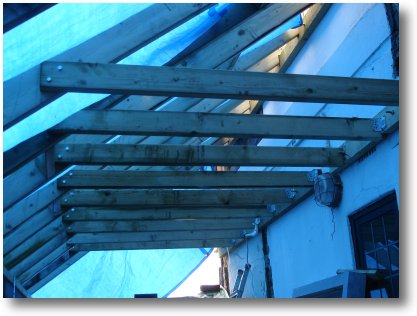
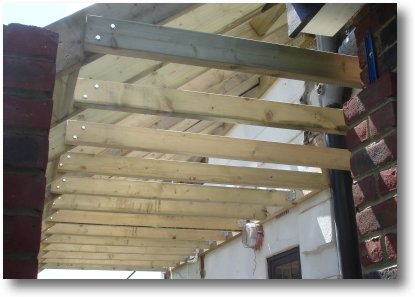
Saturday, 25th May: We started the day by cutting all the tops of the joists.
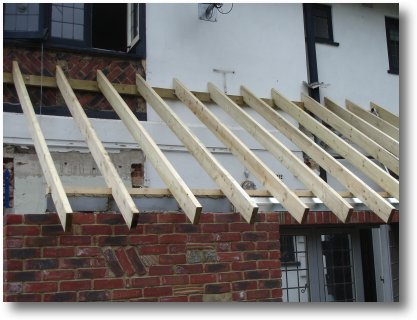
We laid the joists out on the roof and carefully measured each one to get the wall plate notches in the correct positions.
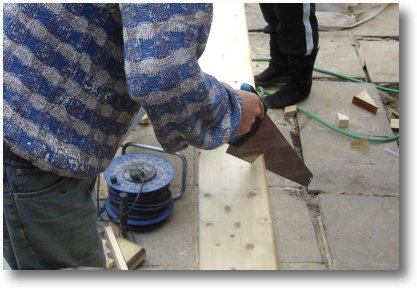
Cutting the notches is easier using a hand saw.
The notches are pretty good, though I have a few gaps of a few millimetres - and a mistake as can be seen on the outtake page.

All joists now fit spaced at 400mm centre
to centre. This is a good width as 1200mm is the width of a plasterboard
sheet and it will make the
mounting of the ceiling easier.
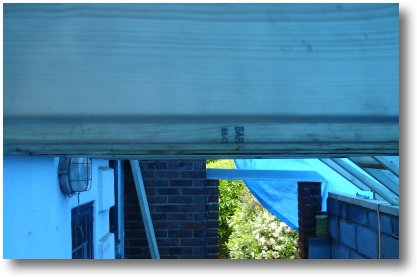
The last job of the day was to cut the ends of the joists so that the soffit board can be attached. This takes a little care as a mistake can prove to be rather expensive!
I used a line with all the joists in place to make sure that all the ends of the joists are aligned.
The next job is place the horizontal 100mm x 50mm ceiling joists, though the weather forecast is rain tomorrow so I might have to have a day off!
After that I need to block the end eve up to the level of the top of the joists.
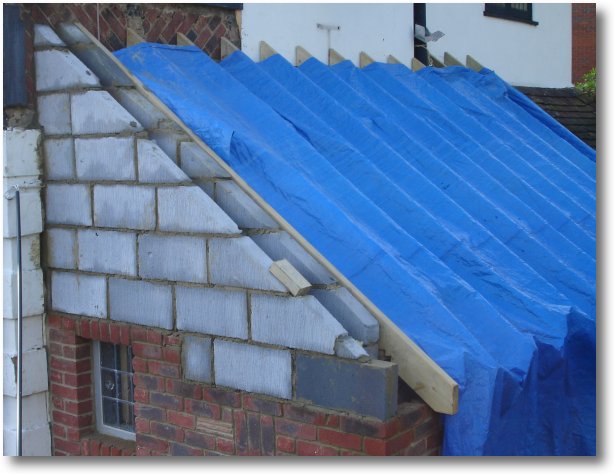
Sunday, 27th May: Heavy rain today - the most I've seen since starting the extension. Fortunately I can now place a tarpaulin over the joists to keep the rain out.
I've mounted the lower wall plate to hold the ceiling rafters.
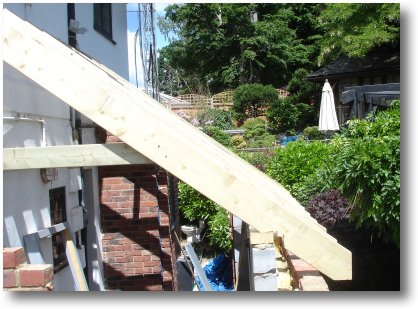
Monday, 28th May: I put in most of the ceiling rafters today, though I need to buy three more joists tomorrow before I can do any more.
It's been pouring with rain all day but at least with the tarpaulin up I can do all the roof work in the dry.
They all seem to be level and at the same height!

Close up of the coach screws I used to connect the ceiling rafters to the roof joists.
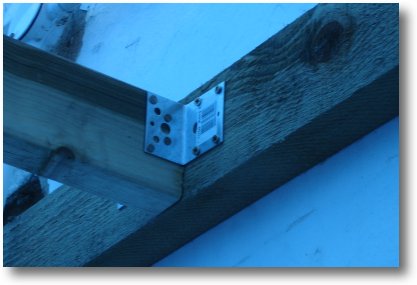
The right-angle brackets I used to connect the ceiling rafters to the wall pate.
I used screws where there is a pulling force of the rafters.
Tuesday, 29th May: I finished fitting the rest of the roof joists today - 13 in total.
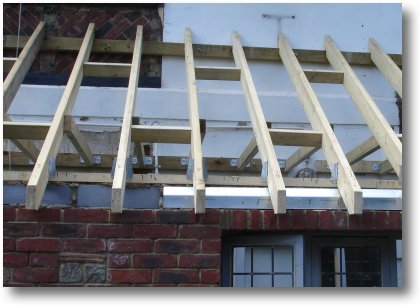
I added 'noggins' 550mm noggins between the joists and added joist hangers to the bottom of the joist to fix them in place on the wall plate.
Eying along the roof, they all seem to be in alignment since I moved the wall plate up that I screwed to the wall in the wrong place.
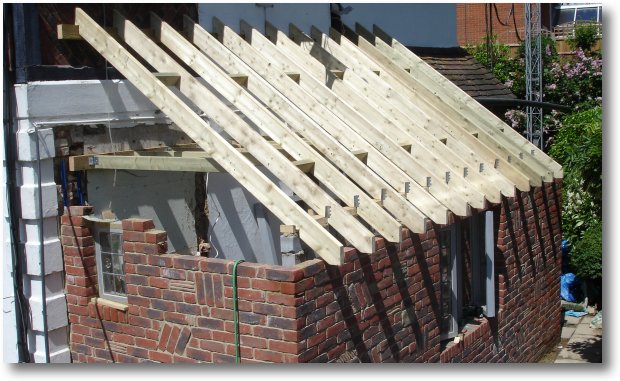
I can now call in the Building regulations Surveyor and block in the gable end ready for tiling.
Wednesday, 30th May: The weather has been awful all day - raining. Perhaps I should have taken the day off!
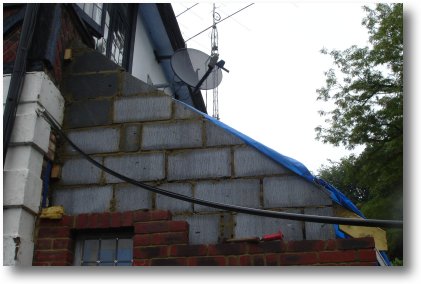
I've spend all day building the gable end of the extension using blocks which will be eventually rendered and painted white.
The outer gable wall is 50mm lower than the inside one so that I can place a length of 50 by 100 mm wood along the top. This will be used to nail the gable soffit board and the tile battons to.
I plan to pick up the 25 by 38mm tile battons and the 900 reclaimed clay roof tiles tomorrow.
Building Control visit Stage 7 - roofing timbers: The Building Control Surveyor came today and OKed the roofing timbers - hooray!