
Rethinking the floor slab!
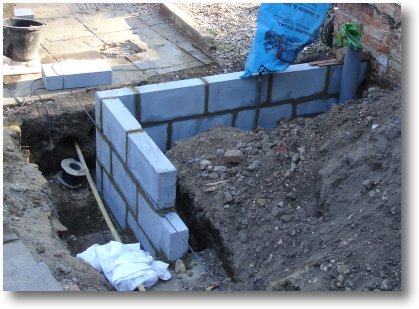
Sunday, 15th April: I used a laser level (very cheap these days!) to look at planning the level of the DPC.
I think at the moment that I would have it one brick higher than shown in the picture next door.
Pointing the level to the south end of the extension shows that the DPC is very high! The laser spot can be seen at the top of the piece of wood - about 500mm above ground level.
Moving the laser a bit shows that if I have the DPC at the level indicated, it would match up with the bitumen damp proofing on the existing house wall (the spot is in the middle).
Pointing the laser to the north end shows the level there as well - the same height as the laser level.
Following a discussion with the Building Control Surveyor, the way I had thought I would lay the slab has completely changed from several aspects:
1 He would like a 150mm thick slab which overlaps the inner block wall and actually rests on it.
2 The slab needs to be keyed into the existing house wall with slots two bricks wide and two bricks deep spread over the length of the slab - wall / keys ratio should be 50%. I can't say I'm happy with this but there you are.
3 He suggests that we use DPC both above and below the slab.
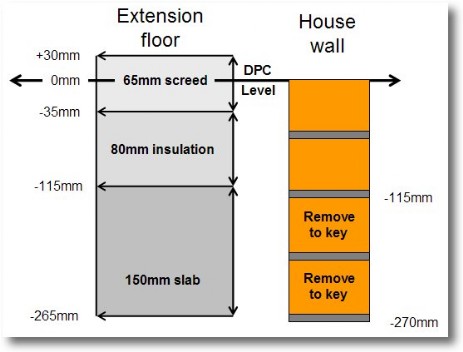
4 Above the slab is 80mm of insulation covered by 65mm concrete screed that straddles the DPC. I should use B784 reinforcing mesh in the slab floor.
After a lot of measuring and contemplating, I've decided that the DPC of the extension will be at the same level as the bitumen DPC in the existing house to keep things easy. This means, if you look at the diagram below, that the slab aligns pretty well with two rows of brickwork two rows below the DPC. Parts of these rows will be removed to key-in the slab. Maybe that is how it is planned?
Therefore...
I need to build the inner block wall up to the level of four brick rows below the DPC. The slab will rest on this wall.
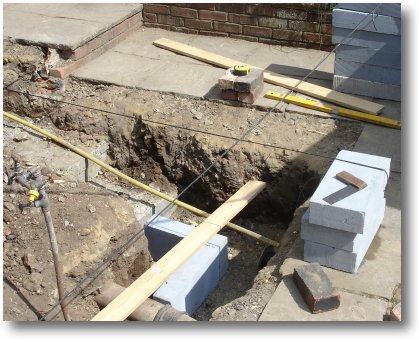
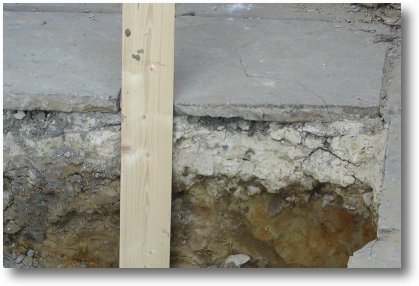
Wednesday, 18th April: Before starting to build the first corner, I exactly marked out where it would fall by laying out two crossed pieces of string.
I then used a level and a ruler to mark the corner on the foundation concrete below where the two pieces of string crossed.
I checked this several times!
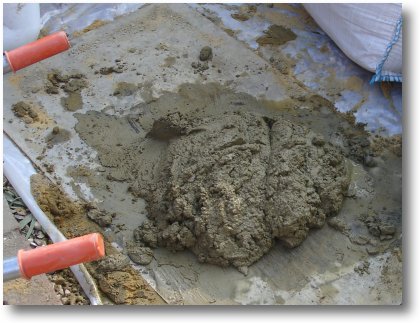
I found out that the aerated blocks I was using really absorbed all the moisture from the cement very quickly so I wetted the edges of the blocks before applying the cement this improved things considerably.
It was also a VERY hot day which did not help!
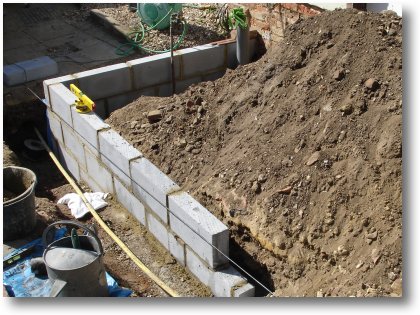
After an afternoon's effort I had the first corner nearly completed. All I need do is add a row of bricks to the top to bring the level of the wall up to the bottom of the fourth row of bricks below the DPC on the main house.
I inserted a couple of strips of steel rod in the mortar above the drain pipe - the wall does not touch the pipe at all.
I called it a day here.
Tomorrow I will build the other corner using the laser level to align the height of the blocks across the length of the extension.
I received a call from Southern Gas today saying that they will post me a quote to move the gas pipe today. She was concerned with "health and safety" issues as I had exposed the gas pipe - the engineer I saw last week did not seem too concerned...

Thursday, 19th April: The day started with the delivery of a pallet of blocks and two pallets of facing bricks.
I started building the long wall using the laser level to ensure that it was level - this worked very well with pretty much zero error over 5 meters. Their use is definitely recommended!
Through luck I guess, at the north end of the wall I needed only one block to achieve the required height.
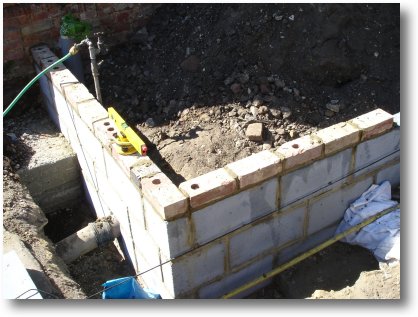
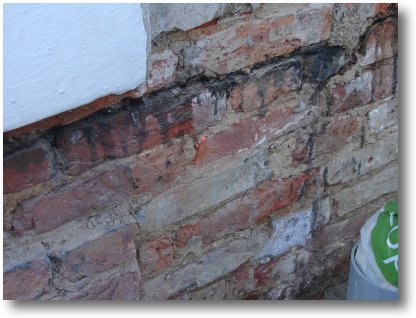
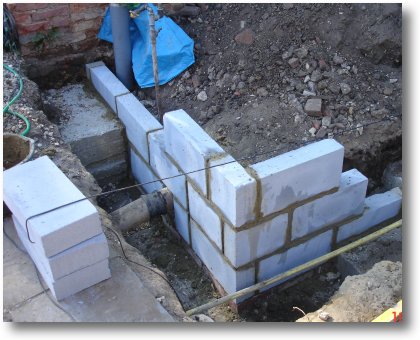
To take the wall up to the required height, I added a row of reclaimed engineering bricks.
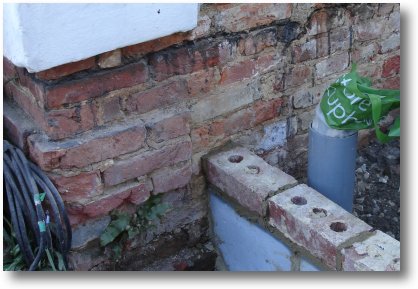
As can be seen in this picture, the row of bricks takes the wall up to the bottom of
the fourth row of bricks below the bitumen DPC in the existing house wall.
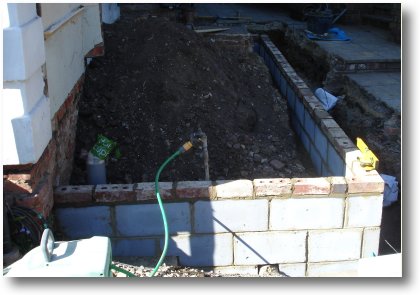
That's it! The foundation wall up to the bottom of slab is completed.
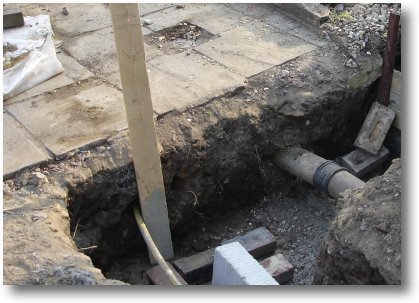
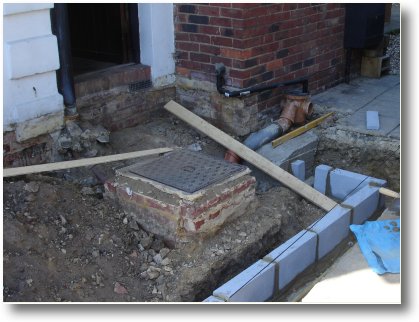
I now need to remove the pile of soil and work on some of the utilities that need to enter the extension below the slab.
I need to cut off the 3/4 inch steel water pipe that you can see in the picture and use a compression Primo adapter to adapt it to standard 22mm copper pipe. I need to turn the mains water off using the control valve in the road outside of the house.